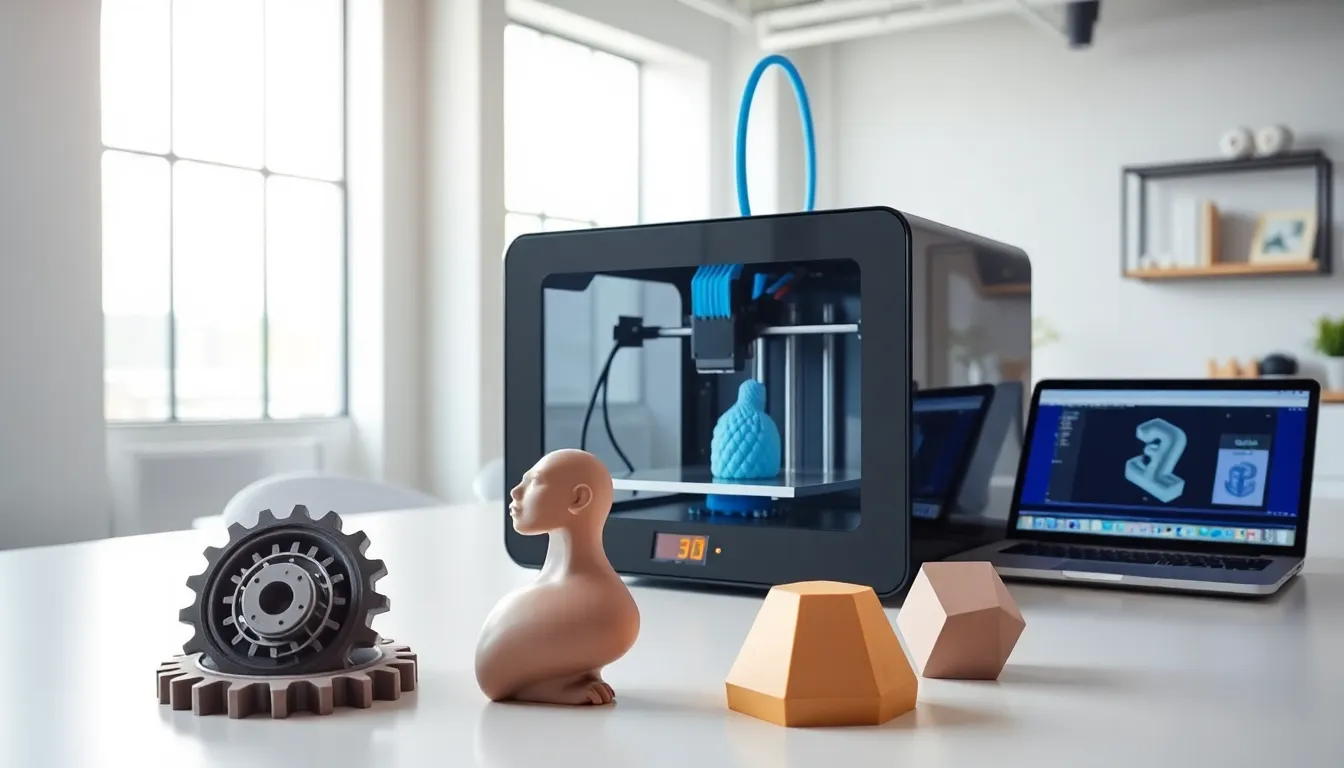
A 3D printing guide can save beginners hours of frustration and wasted filament. This technology transforms digital designs into physical objects, layer by layer. What once required expensive industrial equipment now fits on a desktop for under $300.
3D printing has grown from a niche hobby into a practical tool for creators, hobbyists, and small businesses. People use it to make replacement parts, custom gifts, prototypes, and artistic projects. The learning curve exists, but it’s far gentler than most newcomers expect.
This guide covers the fundamentals every beginner needs. It explains how 3D printing works, the printer types available for home use, and how to pick the right machine. Readers will also learn about materials, filaments, and the steps to complete their first successful print.
Table of Contents
ToggleKey Takeaways
- A 3D printing guide helps beginners avoid common mistakes—start with an FDM printer for its affordability, ease of use, and versatility.
- 3D printing works by building objects layer by layer from a digital file processed through slicing software.
- PLA filament is the best starting material for new users due to its low printing temperature, minimal warping, and beginner-friendly properties.
- When choosing your first 3D printer, prioritize budget, ease of use, community support, and upgrade potential over build volume.
- Proper bed leveling is the most critical step for successful prints—many 3D printing failures stem from an uneven print surface.
- Start with simple models like calibration cubes to learn the basics before attempting complex projects.
How 3D Printing Works
3D printing builds objects by adding material layer by layer. This process is called additive manufacturing. A digital file tells the printer exactly where to place each layer.
The process starts with a 3D model. Users can design their own models using software like Tinkercad or Fusion 360. They can also download ready-made files from sites like Thingiverse or Printables.
The model file goes through slicing software. This program converts the 3D design into instructions the printer understands. It calculates the path for each layer, the speed, and the temperature settings.
During printing, the machine heats material until it becomes soft enough to shape. The print head moves along precise coordinates, depositing thin layers of material. Each layer bonds to the one below it. After hours, or sometimes days, the finished object emerges.
3D printing differs from traditional manufacturing. Machining removes material from a solid block. Molding requires expensive custom molds. 3D printing creates complex shapes without these limitations.
Types of 3D Printers for Home Use
Home users typically choose between two main 3D printing technologies: FDM and resin printers.
FDM Printers
Fused Deposition Modeling (FDM) printers are the most popular choice for beginners. They melt plastic filament and extrude it through a nozzle. FDM machines are affordable, easy to maintain, and use inexpensive materials.
Popular FDM brands include Creality, Prusa, and Anycubic. Entry-level models start around $150. Mid-range options with better features cost $300 to $600.
FDM printers excel at functional parts, large objects, and everyday projects. Print quality is good but shows visible layer lines up close.
Resin Printers
Resin printers use liquid photopolymer resin. A UV light source cures the resin layer by layer. This method produces incredibly detailed prints with smooth surfaces.
Resin printers cost more to operate. The resin itself is pricier than filament. Users also need gloves, ventilation, and cleaning supplies. Uncured resin is toxic and requires careful handling.
Hobbyists choose resin 3D printing for miniatures, jewelry, and dental models. The fine detail makes it ideal for small, intricate objects.
For most beginners, FDM offers the best starting point. It’s forgiving, affordable, and versatile.
Choosing Your First 3D Printer
Selecting the right 3D printer depends on budget, intended use, and comfort with technical work.
Budget sets the realistic options. Under $200 buys capable entry-level machines like the Creality Ender 3. Between $300 and $500, printers offer better reliability, larger build volumes, and improved features. The Prusa Mini+ and Bambu Lab A1 Mini fall in this range.
Build volume determines how large objects can be. Most beginners don’t need massive print beds. A 220mm x 220mm build area handles the majority of projects. Bigger isn’t always better, larger printers take more space and cost more.
Ease of use matters for newcomers to 3D printing. Some printers require extensive assembly and calibration. Others arrive nearly ready to print. Pre-assembled or auto-leveling models reduce early frustration.
Community support proves valuable when problems arise. Popular printer models have active forums, YouTube tutorials, and troubleshooting guides. Choosing a well-known brand means help is always available.
Upgrade potential extends a printer’s lifespan. Many budget printers accept upgrades like better extruders, silent stepper drivers, or enclosure kits.
Essential Materials and Filaments
3D printing materials determine what projects are possible. Each filament type has different properties, strengths, and printing requirements.
PLA (Polylactic Acid)
PLA is the go-to filament for beginners. It prints at lower temperatures, doesn’t warp easily, and produces minimal odor. PLA works for decorative items, prototypes, and low-stress parts. It’s biodegradable and made from renewable resources like corn starch.
The downside? PLA softens at relatively low temperatures. Objects left in hot cars can deform.
PETG
PETG offers more durability than PLA. It resists impact and handles higher temperatures. 3D printing with PETG creates stronger functional parts. The material is slightly trickier to print but still beginner-friendly.
ABS
ABS was the original 3D printing plastic. It’s tough and heat-resistant but requires a heated bed and enclosed printer. ABS releases fumes during printing, so ventilation matters. Most beginners skip ABS until they gain experience.
TPU
TPU creates flexible prints. Phone cases, gaskets, and wearable items use this rubbery material. Printing TPU requires patience and specific settings.
Storage tip: Filament absorbs moisture from the air. Wet filament prints poorly and can clog nozzles. Store spools in sealed containers with desiccant packets.
Getting Started With Your First Print
The first print is exciting, and nerve-wracking. Following a clear process improves the chances of success.
Step 1: Level the bed. A level print bed is essential. The nozzle must maintain consistent distance from the surface. Many 3D printing failures trace back to poor bed leveling. Use the printer’s leveling procedure or install an auto-leveling sensor.
Step 2: Prepare the build surface. Clean the bed with isopropyl alcohol. Some surfaces need glue stick or hairspray for adhesion. Others work best clean.
Step 3: Load filament. Feed filament into the extruder until it flows smoothly from the nozzle. Purge any old material first.
Step 4: Choose a simple model. Start with something small and uncomplicated. A calibration cube or simple keychain teaches basic skills without risking hours of print time.
Step 5: Slice with recommended settings. Use the slicer profiles designed for the specific printer and filament. Avoid tweaking settings until learning what each parameter does.
Step 6: Monitor the first layers. The first few layers determine success. Watch for good adhesion and consistent extrusion. If something looks wrong, stop and adjust.
3D printing rewards patience. The first print rarely looks perfect. Each attempt teaches something new.